Stripe SCA Installation instructions
Please follow these instructions, otherwise nothing will work!
This file assumes you are upgrading to version 3, or have just installed version 3 and have already gone through the main configuration.
1. You need the Stripe Button plugin
To achieve SCA compliance, the Stripe servers now send the status of the payment asynchronously; the Stripe Button plugin handles all the communication sent from the Stripe servers.
It's free, and you can download the v.3 version here.
2. You need to setup Webhooks
Webhooks are the urls on the site that Stripe will call to let us know if a payment succeded or not.
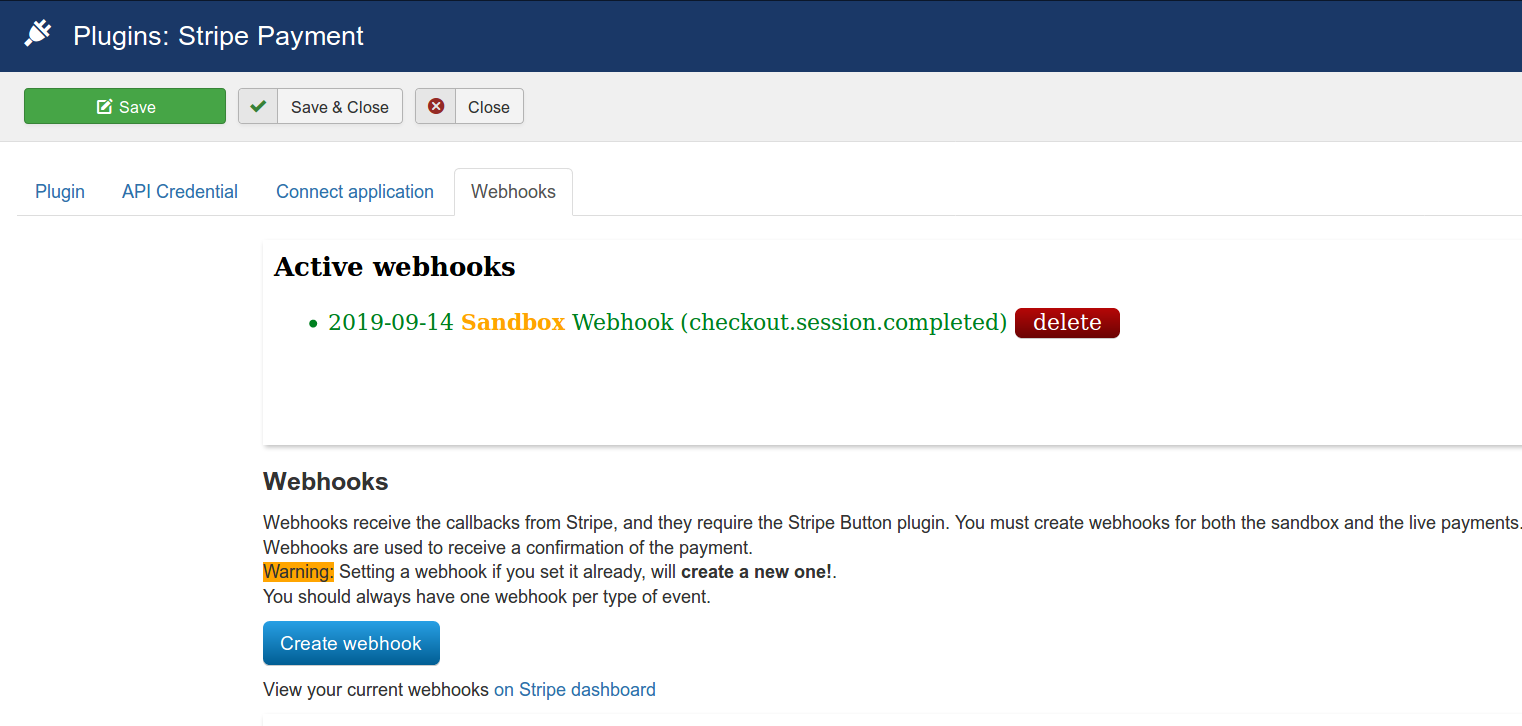
In the plugin configuration, under Webhooks, you will find the list of current Webhooks, and a button to add a new one.
After the button is created the secret code is stored in the settings field below; but it is not save, please do save when advised.
You should have one webhook. If you create too many, simply delete all of them (since you don't know which secret code you have stored).
The only relevant webhooks are of the kind checkout.session.completed, you can safely ignore others here.
You can manage your webhooks from the Stripe Dashboard/Developers/Webhooks.
ATTENTION: Remember to set your webhooks both in the sandbox and in live mode, and ensure your site is using https (you can test with http:, but live mode requires https).
3. Styling the button
The button in v.2 was rendered by Stripe; in v.3 it will render with a similar style. You can override it with a custom css rule like:
div .stripe-button-el {
background-image: linear-gradient(red, orange);
}
Conclusion
This is it! You're ready to use it.